Craving more recipe inspo? Follow me on Pinterest for fresh ideas daily
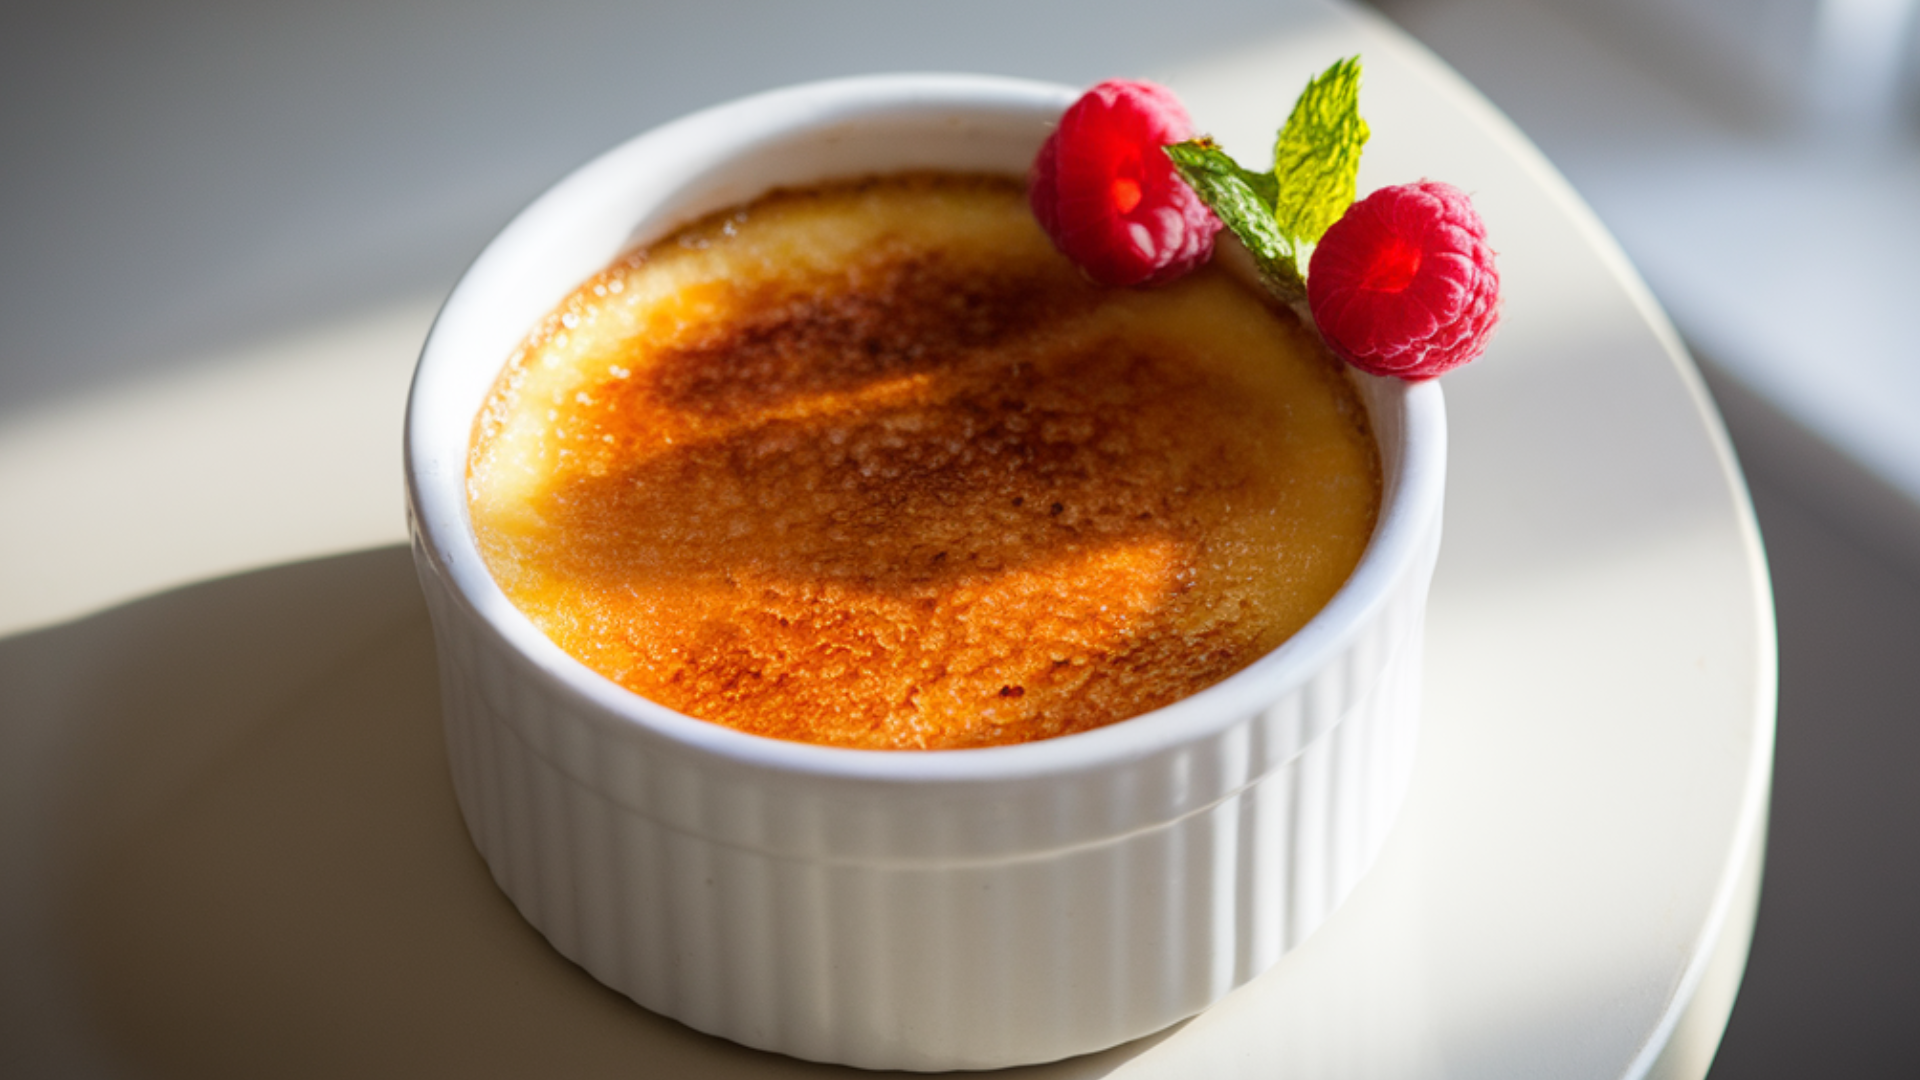
The Best Homemade Crème Brûlée You’ll Ever Taste!
Crème Brûlée
You know what’s funny It’s how food can take you back to moments with family and friends Well I remember the first time I tried making Crème Brûlée I totally burnt the sugar topping Typical me But guess what That didn’t stop me from trying again and again until I nailed it Have you ever tried making it If not you’re definitely in the right place because I’m gonna share everything you need to know
Making Crème Brûlée isn’t always perfect Sometimes the caramel doesn’t brown evenly or the custard jiggles a little too much but that’s part of the fun and honestly it makes it more special Don’t worry if yours looks a bit messy It still tastes amazing Plus isn’t it exciting when a dessert looks fancy but you can actually make it yourself So let’s dive in and make some memories in the kitchen together
Table of Contents
What is Crème Brûlée?
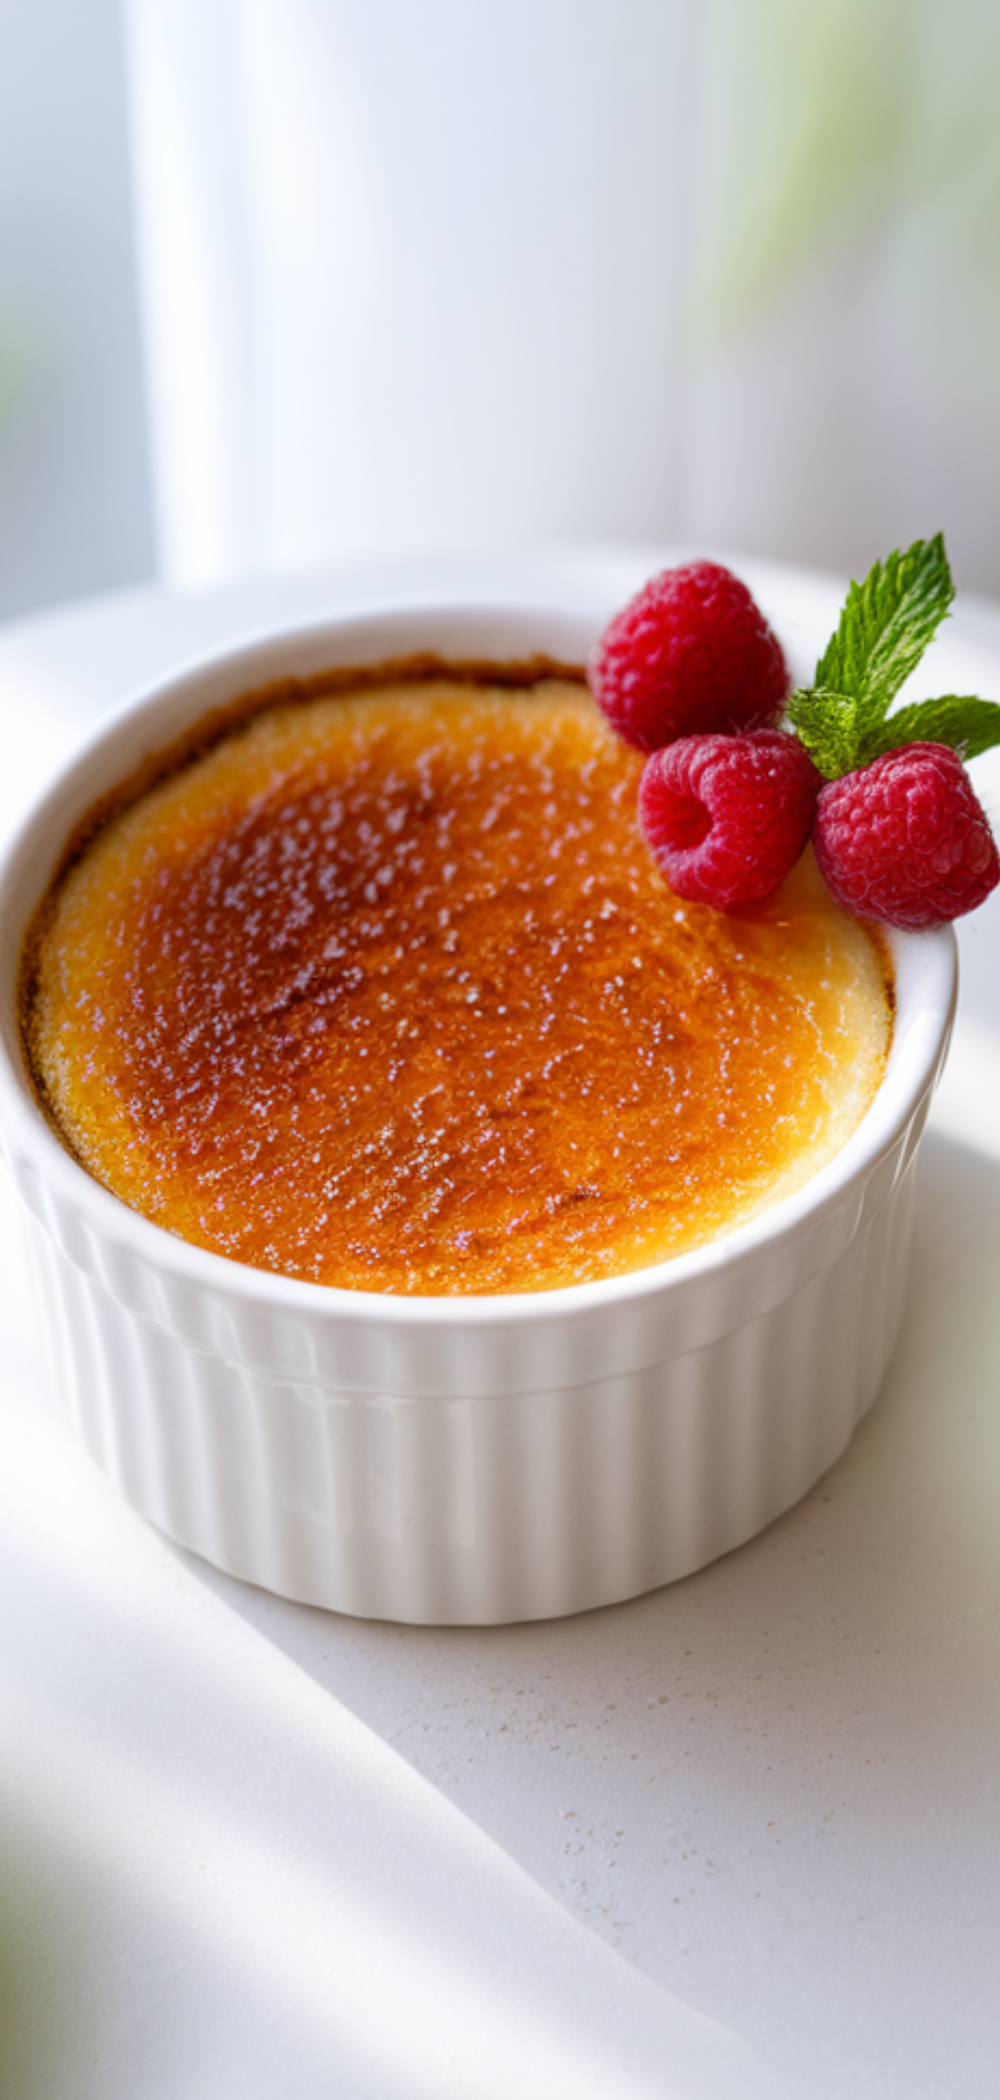
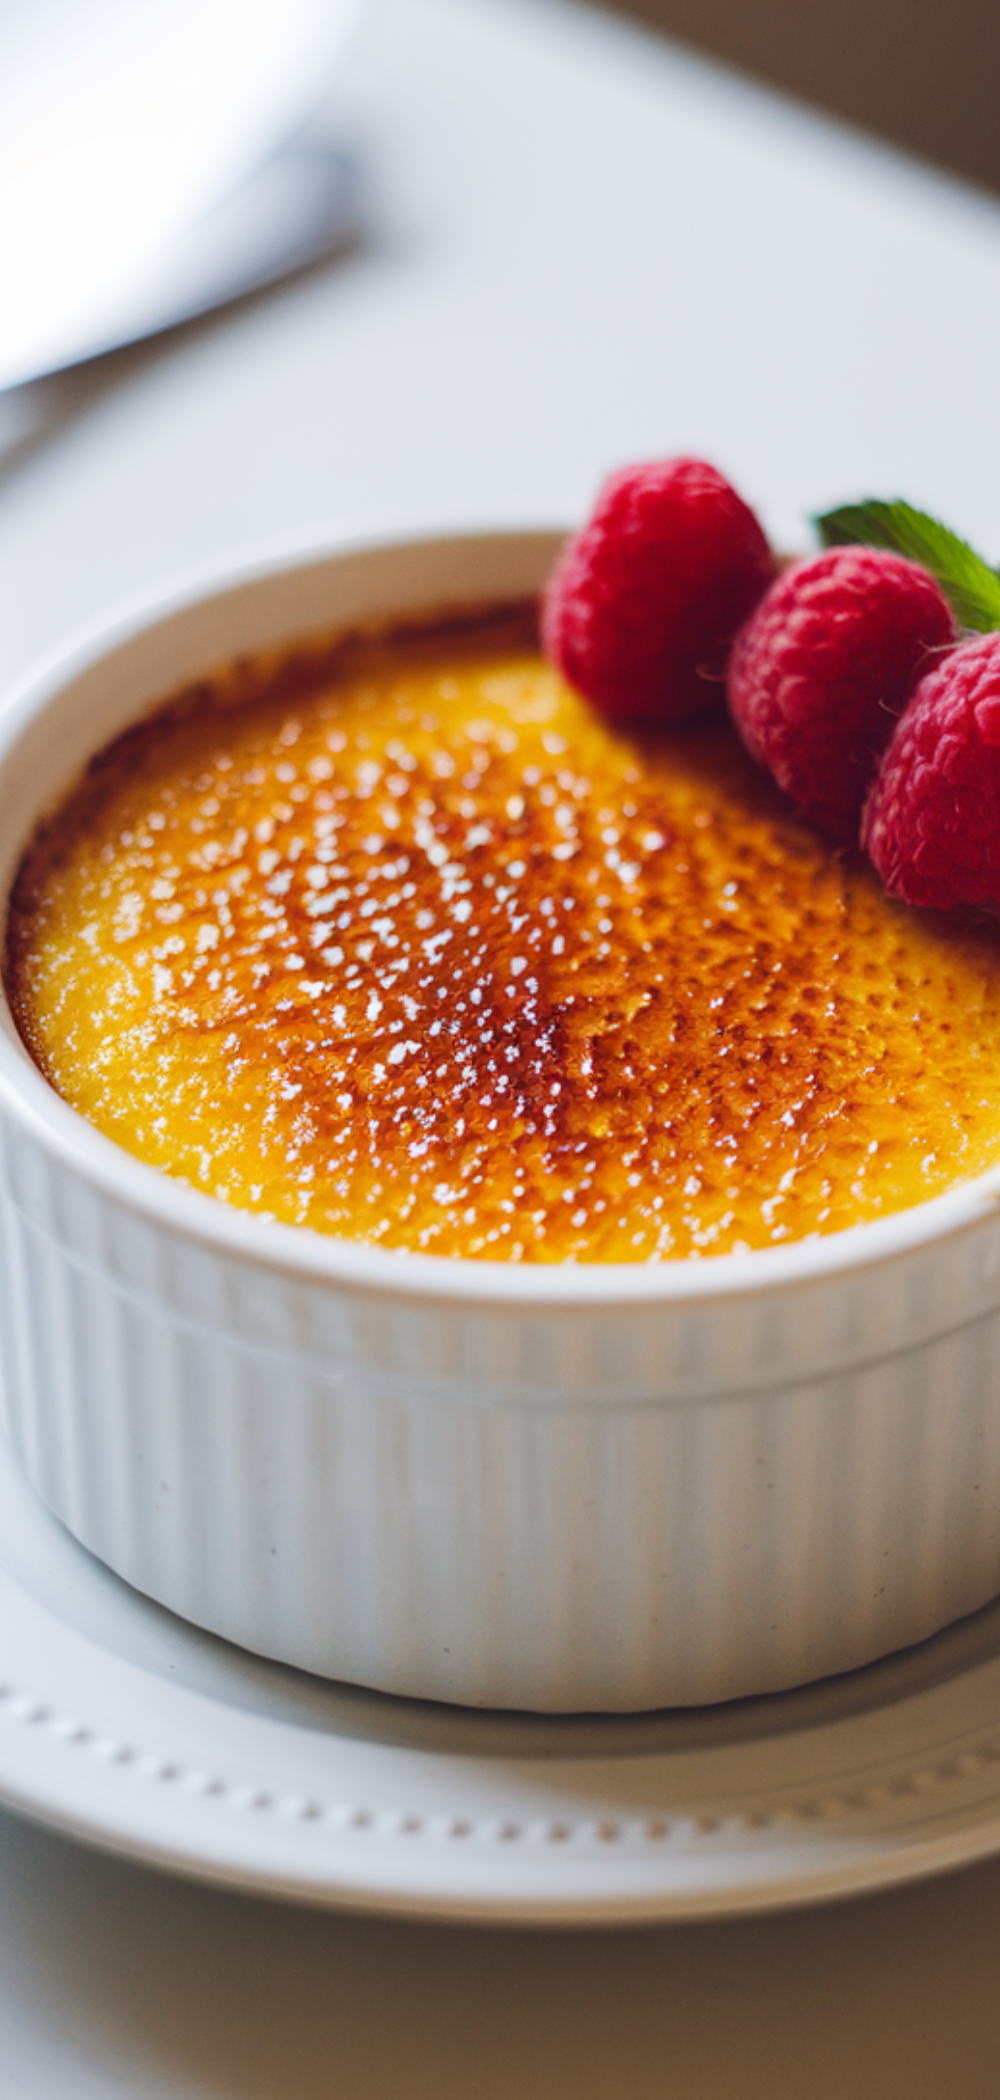
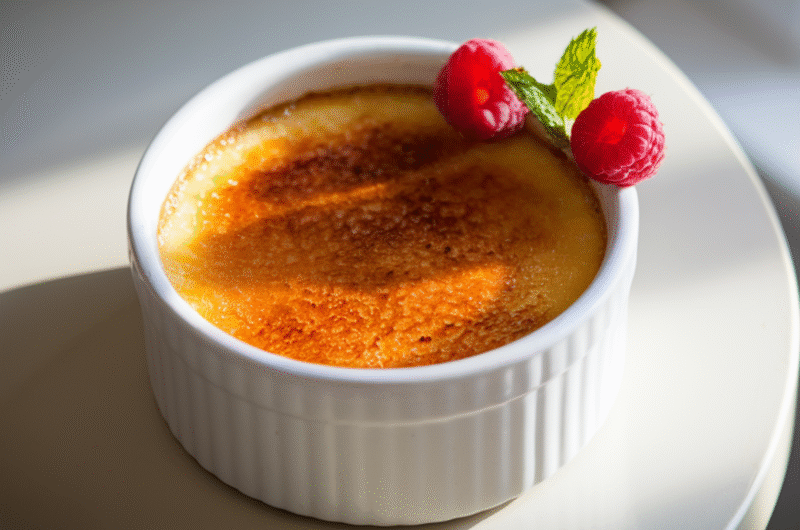
Crème Brûlée is a classic French dessert that many people love. Its name means “burnt cream” in French because of the crispy, caramelized sugar layer on top. Underneath this crunchy sugar shell is a smooth, creamy custard made from eggs, cream, sugar, and vanilla. When you break through the caramelized sugar with a spoon, the custard inside is soft and rich. It’s a dessert that feels fancy but is actually quite simple to make at home. People enjoy it for special occasions, but it’s also a perfect treat to impress friends and family anytime.
What to Eat with Crème Brûlée?
Crème Brûlée is a dessert on its own, but you can serve it with some tasty additions to make it even better. Fresh berries like strawberries, raspberries, or blueberries add a nice, fresh contrast to the creamy custard. Some people like a small scoop of vanilla or berry-flavored ice cream on the side. You could also add a few mint leaves to make it look pretty and give a fresh taste. If you want to keep it simple, a cup of coffee or tea pairs wonderfully with Crème Brûlée. The warmth of the drink complements the cold custard and crunchy top perfectly.
🥄 Ingredients for Crème Brûlée
🥛 2 cups heavy cream – gives that rich, creamy texture we all love.
🌿 1 vanilla bean (or 1 teaspoon vanilla extract) – adds the warm vanilla
🍳 5 large egg yolks – for that smooth, custard-like base.
🍬 ½ cup granulated sugar – sweetens the custard perfectly.
🧂 A pinch of salt – balances the sweetness and enhances flavor.
🔥 Extra sugar for caramelizing – for that classic crackly golden top.
Kitchen Equipment Needed
- Ramekins (small ceramic dishes, about 4-6 ounces each)
- Baking dish or roasting pan (to hold the ramekins)
- Saucepan
- Mixing bowls
- Whisk
- Fine mesh sieve or strainer
- Kitchen torch (for caramelizing sugar) or broiler
- Measuring cups and spoons
- Aluminum foil
👩🍳 Directions – How to Make Crème Brûlée
🔥 Step 1: Preheat & Prepare
Preheat your oven to 325°F (160°C) and place 4–6 ramekins in a large baking dish (you’ll need this later for the water bath).
🥛 Step 2: Heat the Cream
In a small saucepan, pour 2 cups of heavy cream and add the vanilla bean (split it and scrape the seeds in).
Heat it gently until it just starts to steam — don’t let it boil! Then remove it from the heat and let the vanilla flavor soak in.
🍳 Step 3: Whisk the Eggs
In a separate bowl, whisk together 5 egg yolks, ½ cup sugar, and a pinch of salt until it’s smooth and a little pale.
Pro tip 💡: don’t over-whisk, just mix until it’s nicely blended.
🥄 Step 4: Mix Slowly
Now, slowly pour the warm cream into the egg mixture while whisking.
Do this little by little so you don’t cook the eggs by accident (we want custard, not scrambled eggs 😅).
If you’re using vanilla extract instead of a bean, add it now.
🫗 Step 5: Strain & Pour
Pour the mixture through a fine strainer to make sure it’s perfectly smooth.
Then, fill each ramekin evenly with the custard mix.
💧 Step 6: Water Bath Magic
Pour hot water into the baking dish until it reaches halfway up the sides of the ramekins.
This gentle bath helps the custard cook evenly and stay silky soft.
⏱️ Step 7: Bake & Chill
Cover with foil and bake for 40–45 minutes, or until the custard is mostly set but still slightly wobbly in the center.
Take them out carefully, let cool to room temperature, then refrigerate for at least 2 hours (or overnight for best results).
🍬 Step 8: The Caramel Moment
When ready to serve, sprinkle a thin layer of sugar on top of each custard.
Use a kitchen torch to melt and caramelize it until golden brown and crunchy.
No torch? No problem — pop them under the broiler for 2–3 minutes (watch closely 👀).
🍮 Step 9: Serve & Enjoy
Let the sugar cool for a minute so it hardens, then tap it gently with a spoon to break that iconic caramel crust.
Creamy inside, crunchy on top — pure heaven! 😍
How to Store Leftovers?
If you have any leftover Crème Brûlée, keep it covered with plastic wrap or in an airtight container in the refrigerator. It will stay fresh for up to 3 days. Avoid caramelizing the sugar topping until you’re ready to eat it again, because the sugar crust can soften when stored. Just add the sugar and caramelize again right before serving for the best crunchy texture.
Frequently Asked Questions (FAQ)
What can I use if I don’t have a kitchen torch?
You can use your oven’s broiler to caramelize the sugar. Just place the ramekins on the top rack under the broiler for 2 to 3 minutes, but watch carefully so the sugar doesn’t burn.
Can I make Crème Brûlée without eggs?
Eggs are important for the custard’s texture, so traditional Crème Brûlée needs eggs. If you want an egg-free dessert, try a different recipe like panna cotta.
How long can I prepare Crème Brûlée ahead of time?
You can make the custard and refrigerate it for up to 2 days before caramelizing the sugar on top. Just add and torch the sugar before serving.
Why is my custard grainy?
If your custard is grainy, it might have been cooked at too high a temperature, causing the eggs to scramble. Be sure to whisk the hot cream into the eggs slowly and bake gently in a water bath.
What’s the best vanilla to use?
A fresh vanilla bean gives the best flavor, but good-quality vanilla extract also works well if you don’t have a bean.
Can I use milk instead of heavy cream?
Heavy cream gives Crème Brûlée its rich, creamy texture. Using milk will make the custard thinner and less creamy.
Why is the sugar not caramelizing properly?
Make sure to use a fine layer of sugar and spread it evenly. If the sugar is too thick or uneven, it may not melt properly. Also, your torch or broiler should be hot enough to caramelize quickly.
How do I serve crème brûlée?
Serve it chilled, right after caramelizing the sugar on top. Use a spoon to crack the crispy caramelized sugar before enjoying the creamy custard underneath.
Conclusion
Crème Brûlée is a delicious and elegant dessert that’s surprisingly easy to make at home. Its smooth custard and crunchy caramel top make every bite special. Whether you’re making it for a family dinner, a party, or just a treat, this recipe will impress everyone. Don’t forget to try serving it with fresh berries or a warm cup of coffee for a perfect match. If you enjoyed this recipe, please share it with your friends and family and subscribe to the blog for more tasty and simple recipes. Happy cooking!
Crème Brûlée
Course: DessertCuisine: FrenchDifficulty: MediumServings
4
servingsPrep time
15
minutesCooking time
45
minutesCalories
300
kcal🥄 Ingredients for Crème Brûlée
🥛 2 cups heavy cream – gives that rich, creamy texture we all love.
🌿 1 vanilla bean (or 1 teaspoon vanilla extract) – adds the warm vanilla flavor.
🍳 5 large egg yolks – for that smooth, custard-like base.
🍬 ½ cup granulated sugar – sweetens the custard perfectly.
🧂 A pinch of salt – balances the sweetness and enhances flavor.
🔥 Extra sugar for caramelizing – for that classic crackly golden top.
Directions – How to Make Crème Brûlée
- Step 1: Preheat & Prepare: Preheat your oven to 325°F (160°C) and place 4–6 ramekins in a large baking dish (you’ll need this later for the water bath).
- Step 2: Heat the Cream: In a small saucepan, pour 2 cups of heavy cream and add the vanilla bean (split it and scrape the seeds in).
- Step 3: Whisk the Eggs: In a separate bowl, whisk together 5 egg yolks, ½ cup sugar, and a pinch of salt until it’s smooth and a little pale.
- Step 4: Mix Slowly: Now, slowly pour the warm cream into the egg mixture while whisking.
- Do this little by little so you don’t cook the eggs by accident (we want custard, not scrambled eggs 😅).
- If you’re using vanilla extract instead of a bean, add it now.
- Step 5: Strain & Pour
- Pour the mixture through a fine strainer to make sure it’s perfectly smooth.
- Then, fill each ramekin evenly with the custard mix.
- Step 6: Water Bath Magic
- Pour hot water into the baking dish until it reaches halfway up the sides of the ramekins.
- This gentle bath helps the custard cook evenly and stay silky soft.
- Step 7: Bake & Chill
- Cover with foil and bake for 40–45 minutes, or until the custard is mostly set but still slightly wobbly in the center.
- Take them out carefully, let cool to room temperature, then refrigerate for at least 2 hours (or overnight for best results).
- Step 8: The Caramel Moment
- When ready to serve, sprinkle a thin layer of sugar on top of each custard.
- Use a kitchen torch to melt and caramelize it until golden brown and crunchy.
- No torch? No problem — pop them under the broiler for 2–3 minutes (watch closely 👀).
- Step 9: Serve & Enjoy
- Let the sugar cool for a minute so it hardens, then tap it gently with a spoon to break that iconic caramel crust.
- Creamy inside, crunchy on top — pure heaven! 😍
Notes
- Use room-temperature egg yolks for a smoother custard.
If you don’t have a vanilla bean, good-quality vanilla extract works just fine.
Make sure to pour the hot cream into the eggs slowly while whisking to avoid scrambled eggs.
The water bath is important—it helps the custard cook evenly and stay creamy.
Chill the custard for at least 2 hours before torching the sugar for best texture.
Caramelize the sugar just before serving, so the topping stays crisp.
If using the broiler instead of a torch, keep a very close eye—it can burn quickly.
Ramekin size can affect cooking time, so check early if you’re using smaller dishes.