Craving more recipe inspo? Follow me on Pinterest for fresh ideas daily
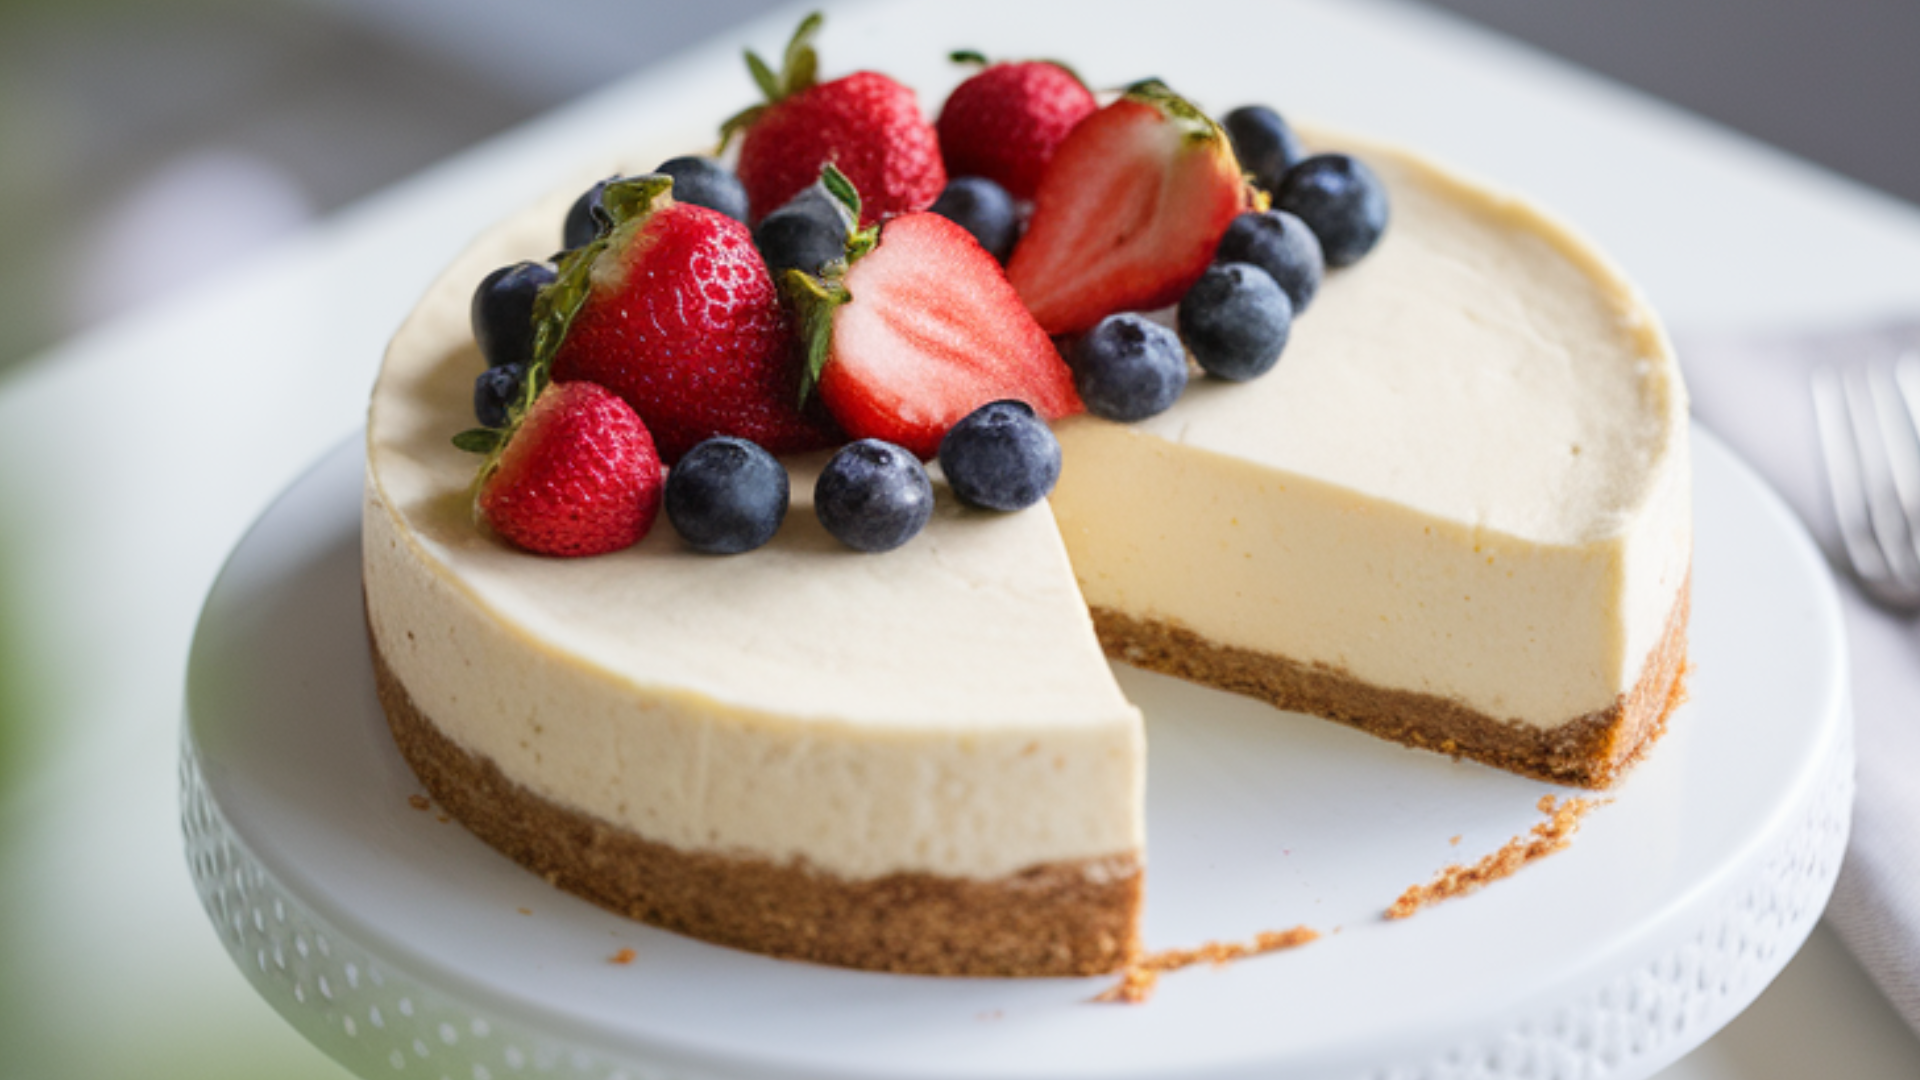
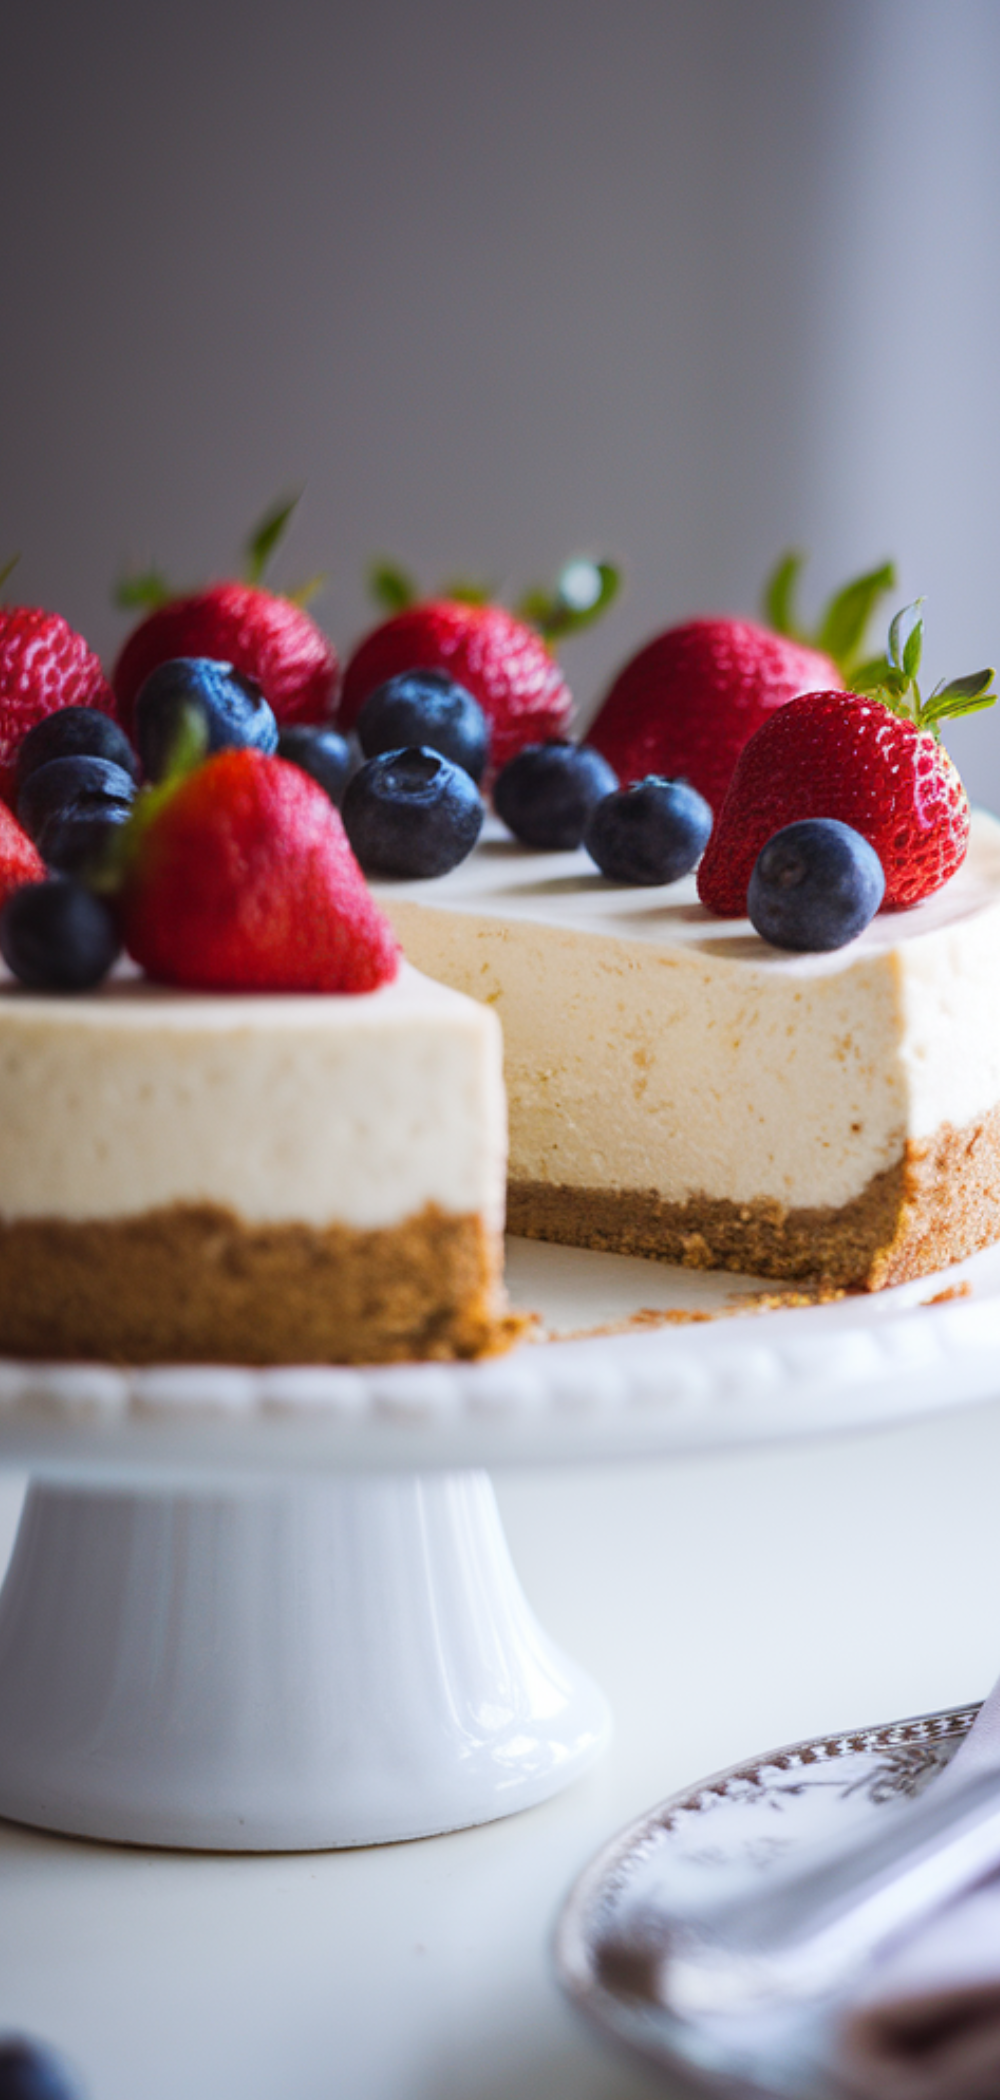
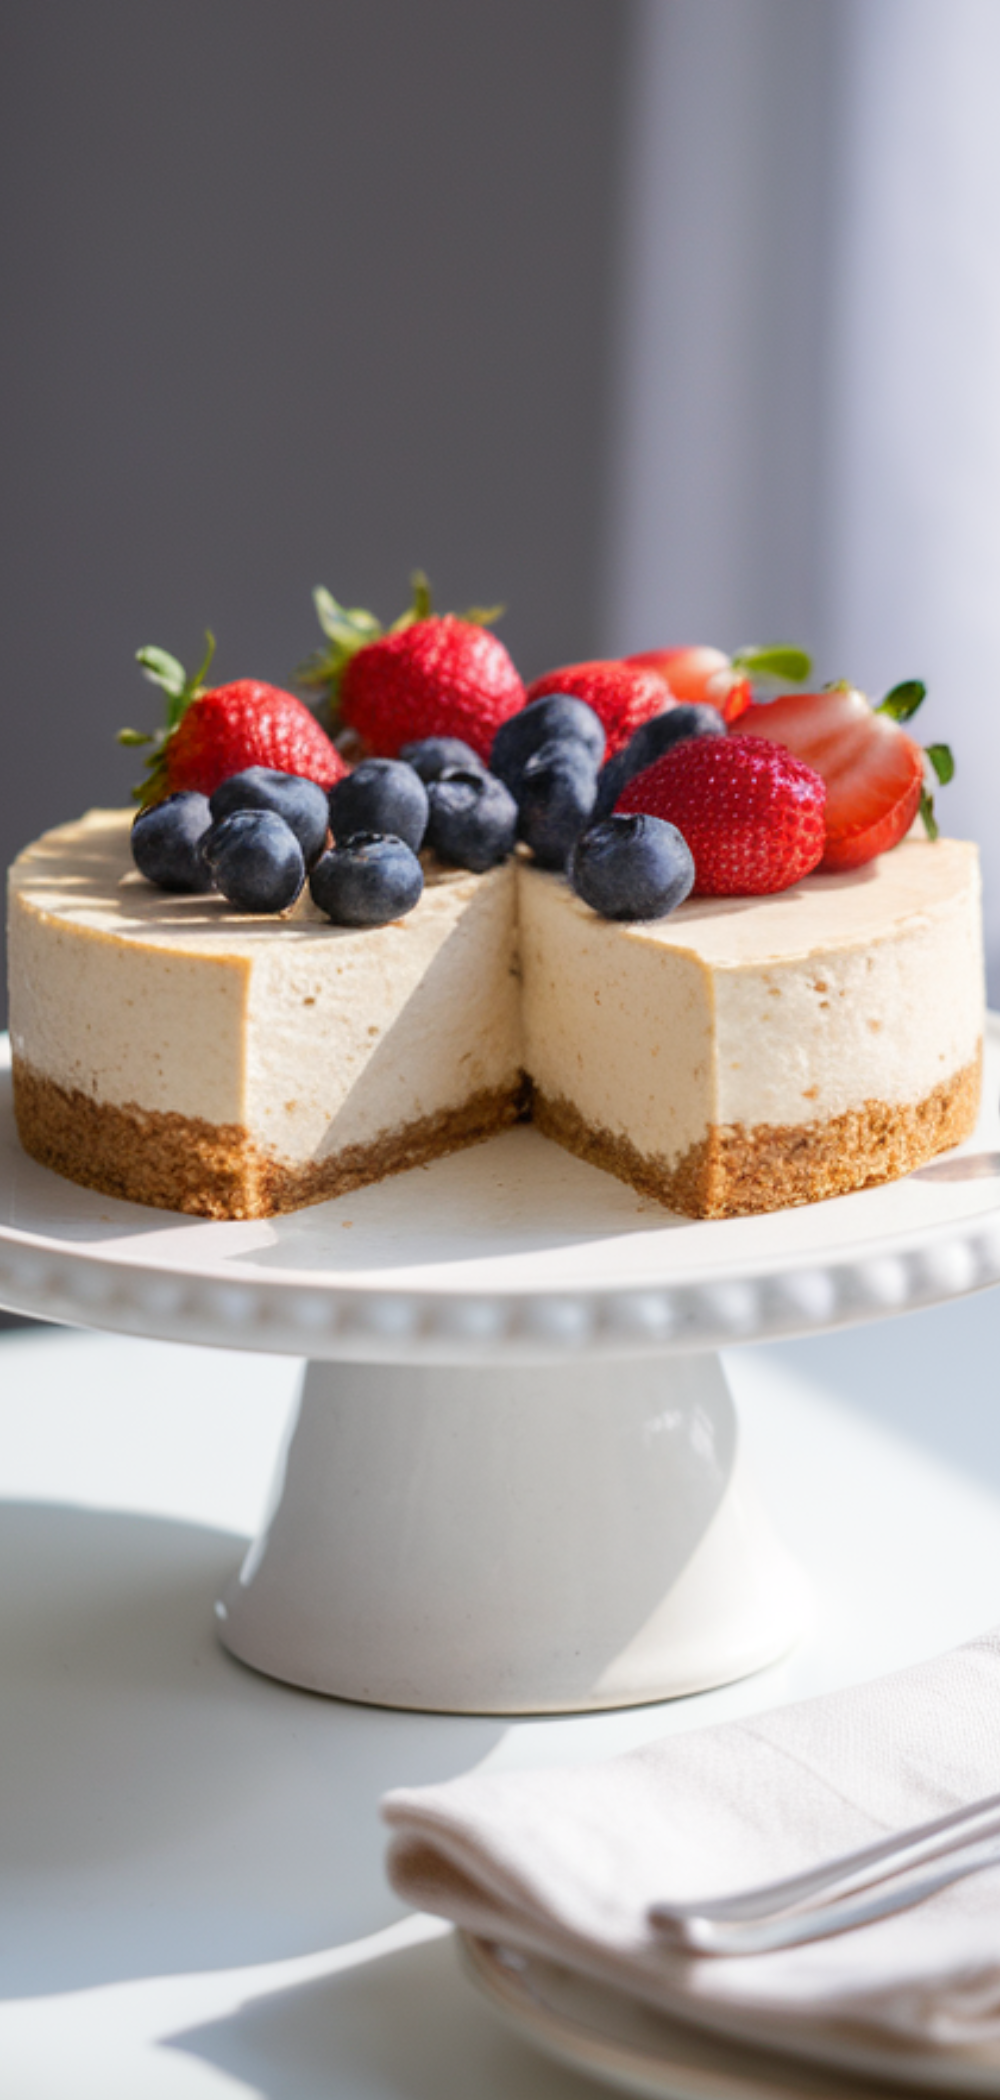
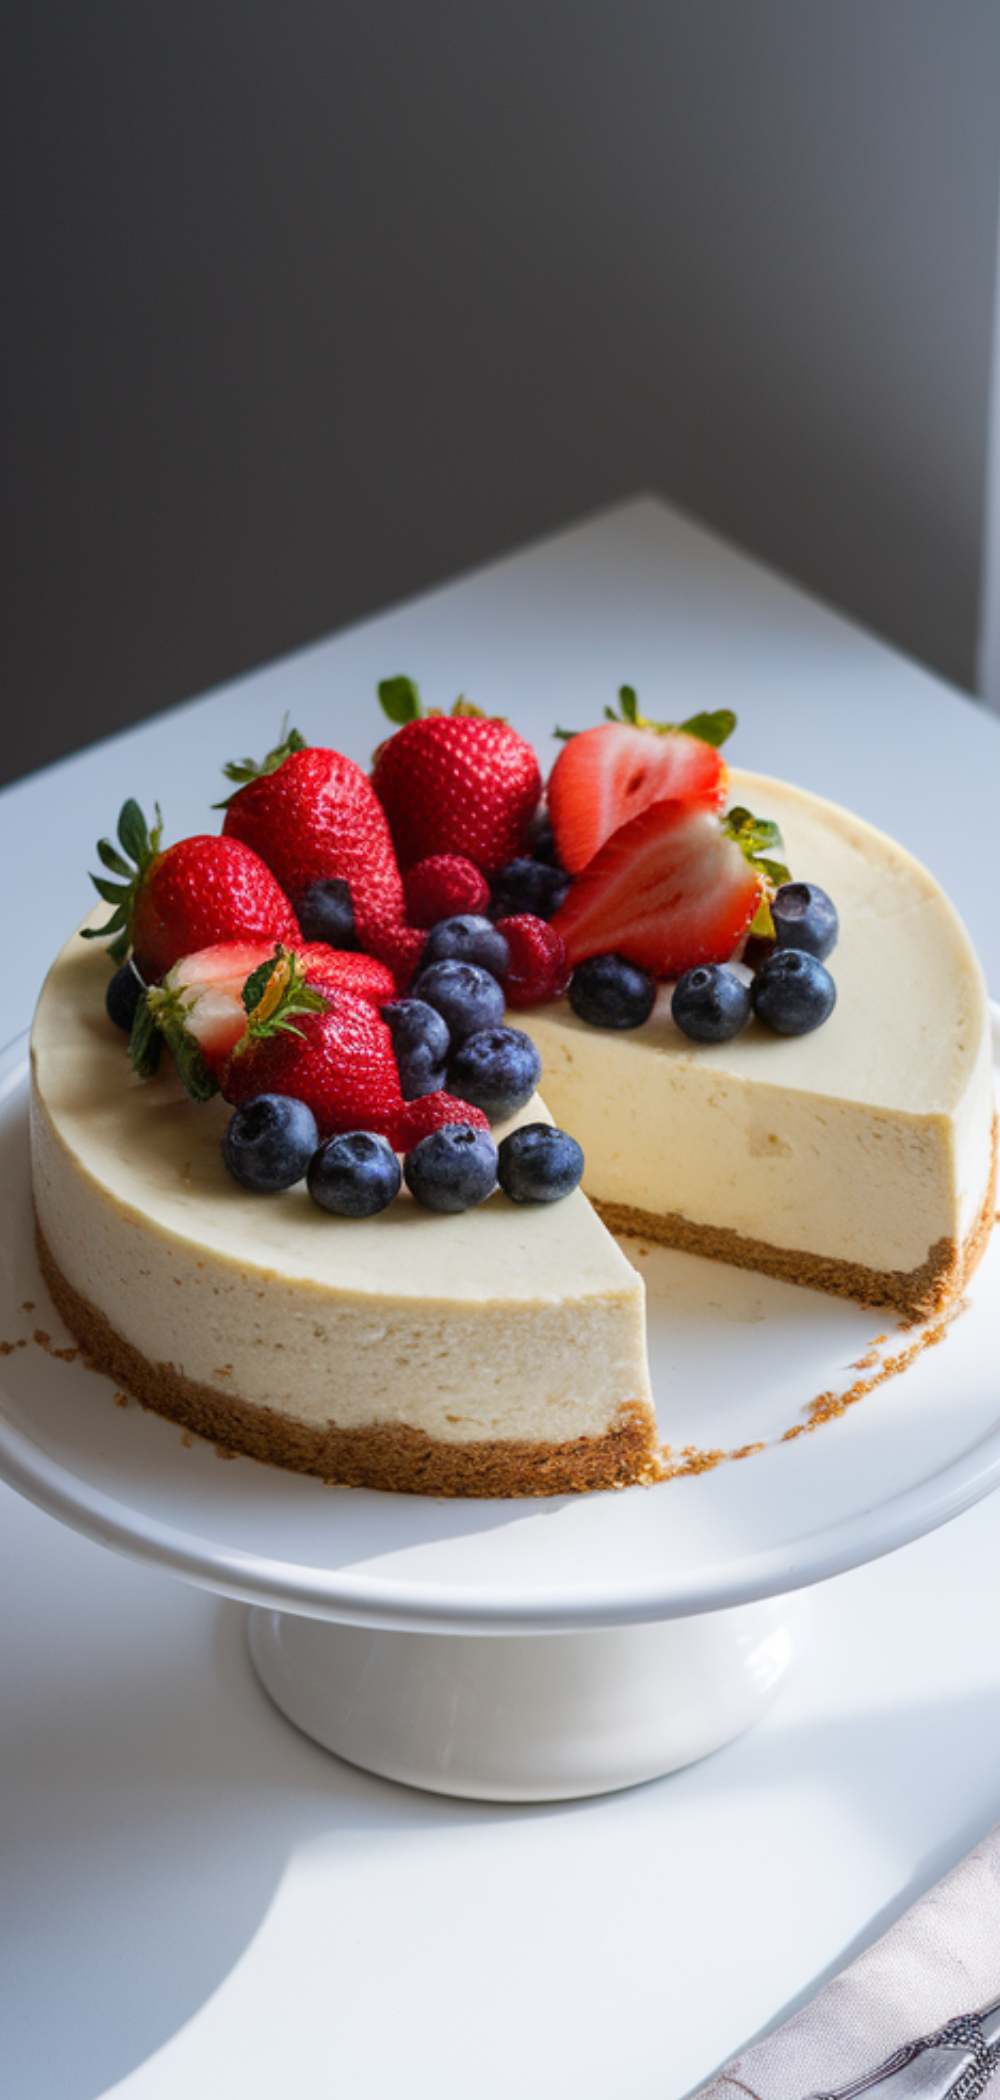
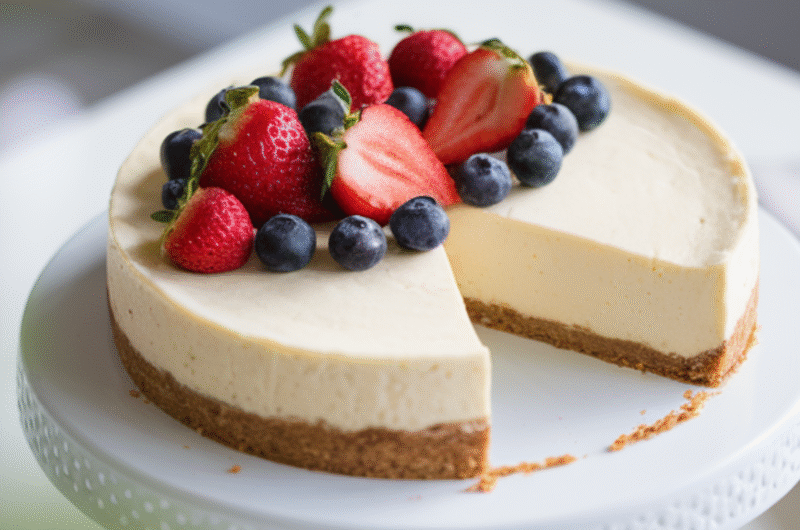
No-Bake Cheesecake
Last summer we went on a family trip to the lake and honestly it was one of those trips where nothing went exactly as planned but somehow that made it perfect because the weather was hot and sticky so we decided baking was out of the question and that’s when I thought hey let’s try a no bake cheesecake instead and you know what I was a little nervous at first because the first time I tried making cheesecake years ago I completely messed it up and it ended up tasting like sweet cardboard so I was half expecting another disaster but this time something magical happened because the filling came out smooth and creamy and everyone kept asking for seconds so even my kids who usually don’t agree on anything were sitting side by side licking their forks and it just hit me how funny it is that food can turn into a memory you’ll keep forever and honestly have you ever had one of those moments where a simple dessert just makes the whole day better because that’s exactly what happened and now every time I make this cheesecake I’m right back at that sunny lake day with the sound of water splashing and my kids laughing in the background and I think that’s the best thing about recipes they’re not just food they’re little time machines in disguise
What is No-Bake Cheesecake
A No-Bake Cheesecake is a creamy, smooth, and fluffy dessert that doesn’t need an oven to taste amazing. Instead of baking, it chills in the refrigerator until it’s firm and ready to enjoy. The filling is made from cream cheese, sugar, and whipped cream (or whipped topping) mixed together to make a light, cloud-like texture. This cheesecake sits on a buttery cookie crust that gives it the perfect crunch with every bite. It’s the ideal treat for hot days when you don’t want to turn on the oven—or anytime you need a quick dessert that feels special.
What to Eat With No-Bake Cheesecake
No-Bake Cheesecake tastes fantastic all by itself, but it’s even better with toppings and sides. You can add fresh fruit like strawberries, blueberries, or raspberries on top for a burst of color and flavor. A drizzle of chocolate syrup, caramel sauce, or berry compote can turn it into a fancy-looking dessert for guests. If you want a more indulgent treat, try serving it with a scoop of vanilla ice cream or a hot cup of coffee. For a refreshing summer twist, pair it with iced tea or a cold lemonade.
No-Bake Cheesecake Ingredients
- For the crust:
- 2 cups graham cracker crumbs (or digestive biscuits)
- ½ cup unsalted butter, melted
- 2 tablespoons sugar
- For the filling:
- 16 oz (450 g) cream cheese, softened
- 1 cup powdered sugar
- 1 teaspoon vanilla extract
- 1 ½ cups heavy whipping cream (or whipped topping)
- Optional toppings:
- Fresh berries
- Chocolate syrup
- Caramel sauce
- Whipped cream
Kitchen Equipment Needed
- Mixing bowls (large and medium)
- Electric hand mixer or stand mixer
- Measuring cups and spoons
- Rubber spatula
- 9-inch springform pan (or deep pie dish)
- Small saucepan (if melting butter on the stove)
- Refrigerator space for chilling
How To Make No-Bake Cheesecake
- Prepare the crust – In a medium bowl, mix the graham cracker crumbs, sugar, and melted butter until the crumbs look like wet sand. Press the mixture firmly into the bottom of a springform pan. Use the back of a spoon or the bottom of a glass to make it smooth and even. Place it in the fridge to chill while you prepare the filling.
- Make the cheesecake filling – In a large mixing bowl, beat the softened cream cheese with an electric mixer until it’s completely smooth and lump-free. Add the powdered sugar and vanilla extract, then mix until combined and creamy.
- Whip the cream – In another bowl, whip the heavy cream until stiff peaks form. This means the cream holds its shape when you lift the mixer beaters.
- Combine everything – Gently fold the whipped cream into the cream cheese mixture using a rubber spatula. Do this slowly to keep the mixture light and fluffy.
- Fill the crust – Take the crust from the fridge and pour in the cheesecake filling. Spread it evenly with a spatula, making sure it’s nice and smooth on top.
- Chill to set – Cover the cheesecake with plastic wrap and refrigerate for at least 4–6 hours, or overnight for best results. This step is important because the cheesecake needs time to firm up.
- Add toppings and serve – Once set, carefully remove the cheesecake from the springform pan. Add your favorite toppings, slice, and enjoy.
How to Store Leftovers
If you have any cheesecake left (which is rare!), store it in the refrigerator in an airtight container or cover it with plastic wrap. It will stay fresh for up to 4 days. You can also freeze slices by wrapping them in plastic wrap and placing them in a freezer-safe container for up to 1 month. When ready to eat, thaw in the fridge for a few hours before serving.
FAQ
1. Can I use store-bought whipped topping instead of whipping cream?
Yes! Store-bought whipped topping works well and can save you time. Just fold it into the cream cheese mixture as you would with homemade whipped cream.
2. Can I make this cheesecake without a springform pan?
Yes. A deep pie dish or square baking dish will work. Just line it with parchment paper for easier removal.
3. Can I make this cheesecake dairy-free?
You can! Use dairy-free cream cheese and whipped coconut cream instead of regular cream cheese and heavy cream.
4. How can I make a chocolate version?
Add ½ cup melted chocolate to the cream cheese mixture before folding in the whipped cream. You can also use chocolate cookie crumbs for the crust.
5. How long does it take for the cheesecake to set?
It usually takes at least 4–6 hours in the fridge. Overnight chilling gives the best texture.
6. Why is my cheesecake runny?
It may not have chilled long enough, or the whipped cream wasn’t whipped enough before mixing. Make sure to follow the steps carefully for the best results.
7. Can I add fruit inside the cheesecake filling?
Yes! You can fold in small fruit pieces like blueberries or chopped strawberries before chilling. Just avoid adding too much, or it may make the cheesecake watery.
8. Can I prepare this cheesecake ahead of time?
Absolutely! In fact, making it the night before a party or event is perfect because it gives the cheesecake plenty of time to set.
Conclusion
No-Bake Cheesecake is one of those recipes that feels fancy but is actually super simple to make. With just a few ingredients and no oven required, it’s a dessert that even beginner cooks—and kids—can help prepare. Whether you dress it up with berries and chocolate or keep it plain and classic, it’s always a hit at the table. If you try this recipe, please share it with your friends and family, and don’t forget to subscribe to my blog for more easy and delicious recipes.
No-Bake Cheesecake
Course: DessertCuisine: AmericanDifficulty: EasyServings
8
servingsPrep time
20
minutesCooking timeminutes
Calories
350
kcalIngredients
For the crust:
2 cups graham cracker crumbs (or digestive biscuits)
½ cup unsalted butter, melted
2 tablespoons sugar
For the filling:
16 oz (450 g) cream cheese, softened
1 cup powdered sugar
1 teaspoon vanilla extract
1 ½ cups heavy whipping cream (or whipped topping)
Optional toppings:
Fresh berries
Chocolate syrup
Caramel sauce
Whipped cream
Directions
- Prepare the crust – In a medium bowl, mix the graham cracker crumbs, sugar, and melted butter until the crumbs look like wet sand. Press the mixture firmly into the bottom of a springform pan. Use the back of a spoon or the bottom of a glass to make it smooth and even. Place it in the fridge to chill while you prepare the filling.
- Make the cheesecake filling – In a large mixing bowl, beat the softened cream cheese with an electric mixer until it’s completely smooth and lump-free. Add the powdered sugar and vanilla extract, then mix until combined and creamy.
- Whip the cream – In another bowl, whip the heavy cream until stiff peaks form. This means the cream holds its shape when you lift the mixer beaters.
- Combine everything – Gently fold the whipped cream into the cream cheese mixture using a rubber spatula. Do this slowly to keep the mixture light and fluffy.
- Fill the crust – Take the crust from the fridge and pour in the cheesecake filling. Spread it evenly with a spatula, making sure it’s nice and smooth on top.
- Chill to set – Cover the cheesecake with plastic wrap and refrigerate for at least 4–6 hours, or overnight for best results. This step is important because the cheesecake needs time to firm up.
- Add toppings and serve – Once set, carefully remove the cheesecake from the springform pan. Add your favorite toppings, slice, and enjoy.